
How Do I Arrange Multiple Photos on LinkedIn?
Linkedin is currently among the top platforms when it comes to showcasing your professional achievements. Also, you can create meaningful connections there, which can help you in growing your business.
You can help create an eye-catching profile by incorporating photos into your page. But with all the amazing pictures you’ve collected over time, it can be tricky to decide which ones to use and how to arrange them.
Whether you are just starting out on LinkedIn or looking for tips to enhance your profile, this guide is here to help! Here, we will explore the best practices for adding and arranging multiple photos on your Linkedin page in order to give yourself a stellar online presence.
What are the Image Formats for a good LinkedIn Post?
If we talk about making an engaging post on LinkedIn, having effective visuals is key. Keeping an eye out for the right image formats to use is a wise move that can make your post stand out. For profile pictures and banners, we suggest you to use images in JPG or GIF format. However, when it comes to other posts, PNG format can be the best due to their high resolution and reduced file size.
Also, adding videos or GIFs can be particularly eye-catching and may serve to draw more attention from viewers. Ultimately, knowing the appropriate image formats for your LinkedIn post can help you capture followers’ attention in an efficient manner.
How to add Multiple Images on LinkedIn?
Adding multiple images to your LinkedIn profile can bring life to your professional identity and make it more convincing for potential hiring managers. It’s an important step if you want to stand out from the competition when applying for jobs.
You can add multiple images on LinkedIn by creating a LinkedIn post or article and uploading the images to it. Here are the steps to add multiple images on LinkedIn:
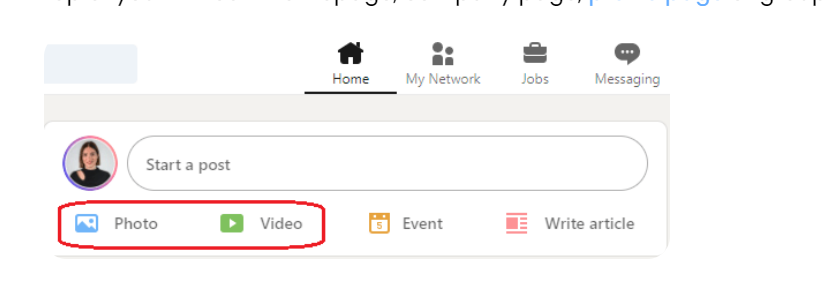
Step 1: Log in to your LinkedIn account and go to your LinkedIn homepage.
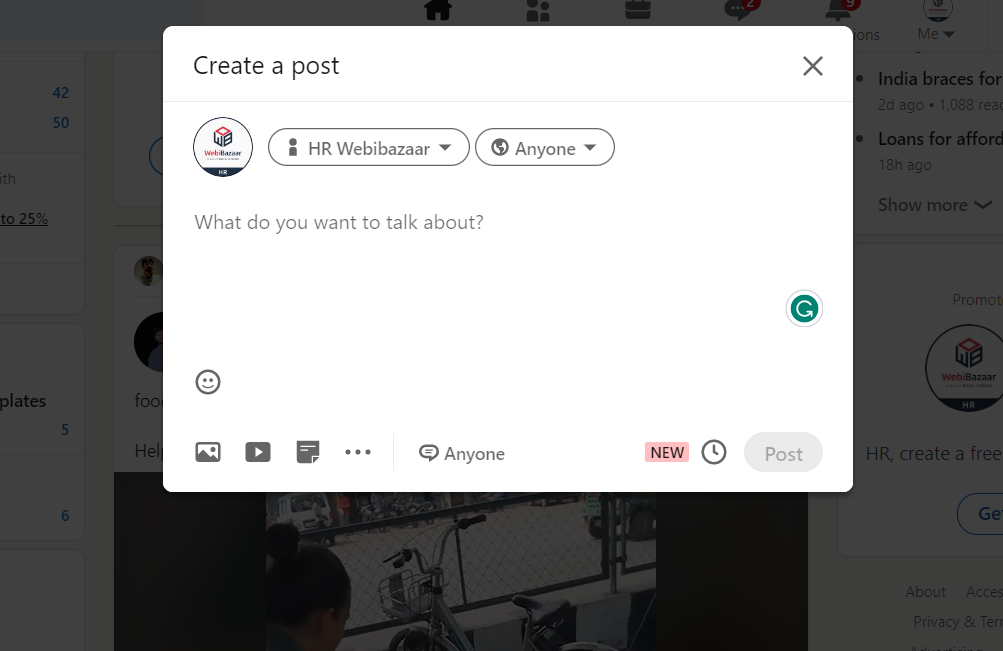
Step 2: Click on the “Create a post” button, which is located at the top of your newsfeed.
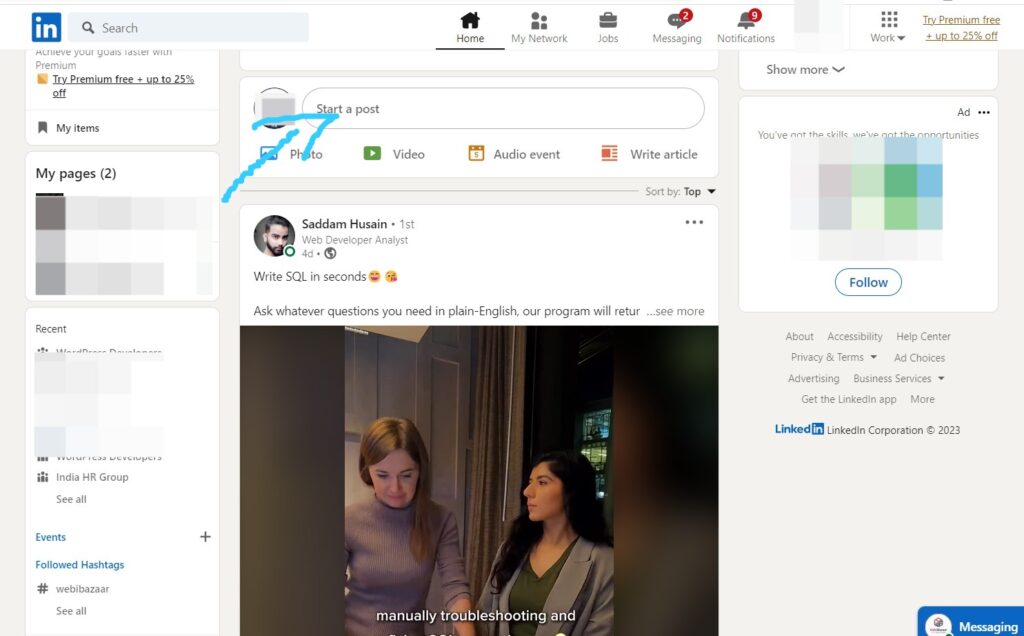
Step 3: Click on the camera icon, which is located at the bottom of the post box.
Step 4: Select the images you want to upload by clicking on the “Choose file” button.
Step 5: You can upload up to nine images at a time.
Step 6: Once you have selected the images, click on the “Open” button to upload them.
Step 7: You can then add a caption to the post and tag any relevant people or companies.

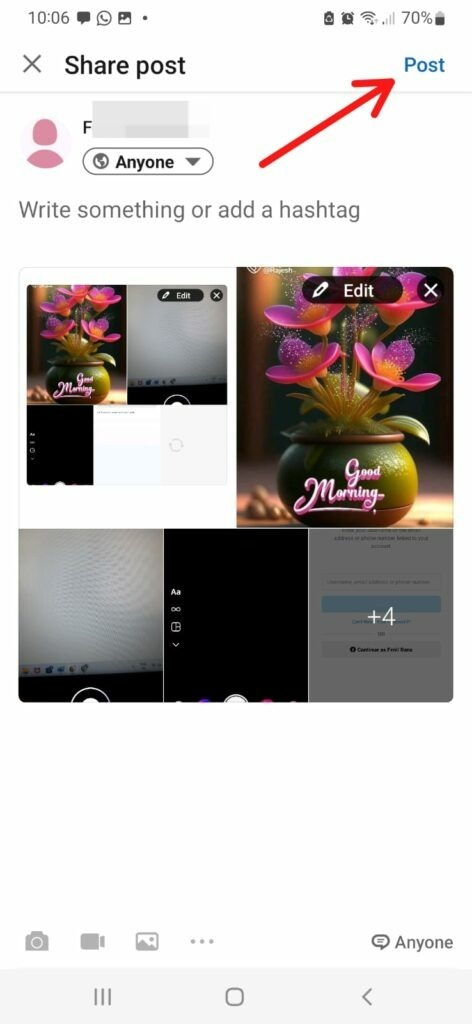
Step 8: Click on the “Post” button to share your post with your network.
How to add Multiple Images to LinkedIn Article?
You can also create an article on LinkedIn and add multiple images to it. To do this, follow these steps:
Step 1: Click on the “Write an article” button, which is located on your LinkedIn homepage.
Step 2: Give your article a title and write the content.
Step 3: Click on the “Insert image” button, which is located in the toolbar.
Step 4: Select the images you want to upload by clicking on the “Choose file” button.
Step 5: You can upload up to nine images at a time.
Step 6: Once you have selected the images, click on the “Open” button to upload them.
Step 7: You can then position the images within your article and add captions.
Step 8: When you are finished, click on the “Publish” button to publish your article on LinkedIn.
How Many Photos Can You Attach to a LinkedIn Post?
LinkedIn is a great tool for professionals to network, keep on top of industry news, and more. A feature that many people don’t know about is the ability to attach photos to posts. This can be a fantastic way to add a splash of visual interest to your post and make your content stand out in the LinkedIn feed.
Once you’ve written your post, you can attach up to nine images – be aware that if you have multiple images, they will be shown as a carousel, so choose wisely! People are attracted to visually stimulating content which could mean more engagement with your post. So take advantage of this cool feature and see what kind of response it generates!
Mobile
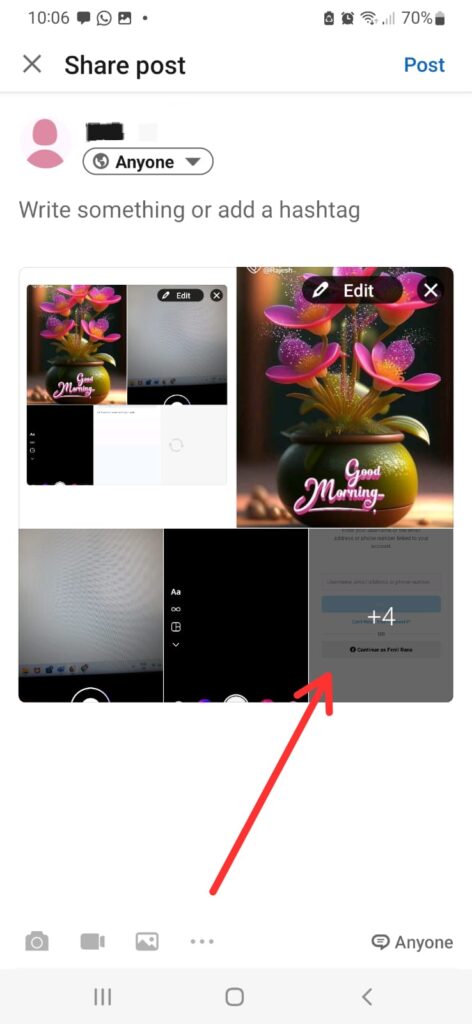
Step 1: Download the LinkedIn mobile app from your device’s app store.

Step 2: Once you open the app, log in with your username and password.
Step 3: Tap the Share button located at the top of the screen to start a post.
Step 4: Write your post in the provided text field or add a file or photo from your device by tapping “Add Photo/Video”.

Step 5: Add tags to your post to increase its visibility by tapping “Tag People” and selecting relevant contacts.
Step 6: When you are finished writing your post, tap “Post” to share it with your followers.
Desktop
Step 1: Open up your web browser and navigate to www.linkedin.com.
Step 2: Log in with your username and password.
Step 3: Click the Share button located at the top of the page to start a post.
Step 4: Write your post in the provided text field or add a file or photo from your device by clicking “Upload File”.
Step 5: If desired, add tags to your post to increase its visibility by clicking “Tag People” and selecting relevant contacts.
Step 6: When you are finished writing your post, click “Share” to share it with your followers.
How Do I Rearrange Photos in a LinkedIn Post?
Step 1: Log in with your username and password.
Step 2: Select the post from your profile you wish to rearrange images for and click “Edit” at the bottom of the post window.
Step 3: Click the “Photos” tab next to the text box to add or rearrange images in your post window.
Step 4: Hover over each image to see a preview and rearrange them by dragging them into the desired position or delete unwanted images by clicking on the “X” icon at the top right corner until all photos are arranged as desired.
Step 5: When you are finished, click “Save”, and your photo order will be changed on your post.
Conclusion
In conclusion, arranging multiple photos on LinkedIn is a great way to take advantage of the visual aspect of networking. Whether organizing the photos in a collage style or simply creating an album, you can make your profile highly engaging and showcase another side of yourself.
It’s also important to remember that LinkedIn is a professional platform, so limiting the images shared to things like professional headshots, events attended, awards won, and any other appropriate accomplishments for the site is wise. Ultimately, knowing how to arrange multiple photos on LinkedIn could be the difference between making a good impression and getting ignored.